
B.E. Creative Temp Station® Instructions
Get to Know the Temp Station
- Power Button/QR Code
- 1.3" Screen
- Gooseneck Arm
- Sensor
- Sensor Interface
- USB-C Charging Port
- Fahrenheit/Celsius Button
- Reset Button
- Locations for Rubber Feet
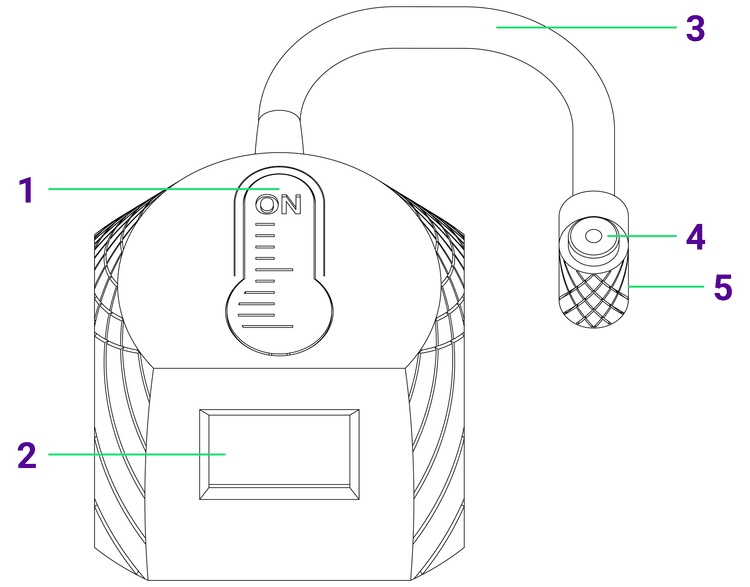
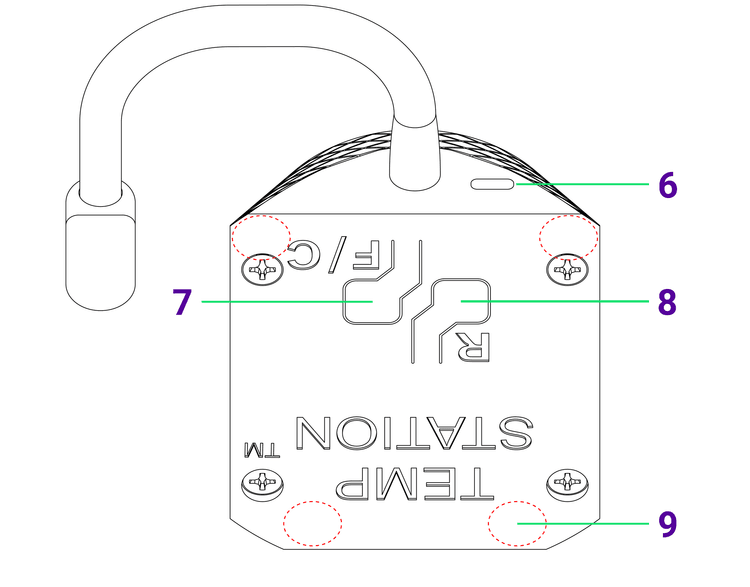
Charging

To charge the Temp Station, use the provided USB-A to USB-C charging cable. A full charge can take up to 4 hours depending on supplied wattage. Do NOT use power bricks over 20W.
Using the Temp Station
Powering On
To power on the Temp Station, press the power button (1) once
Powering Off
To turn off the Temp Station, press and hold the power button (1) for 5 seconds
Auto Shut-Off
The Temp Station will automatically turn off after 5 minutes without use
Screen Interface
- Fahrenheit/Celsius Indicator
- Battery Life Indicator
- Temperature
- “750+ °F” / “400+ °C” Screen
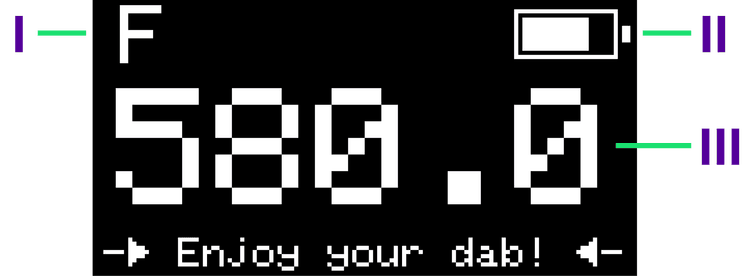
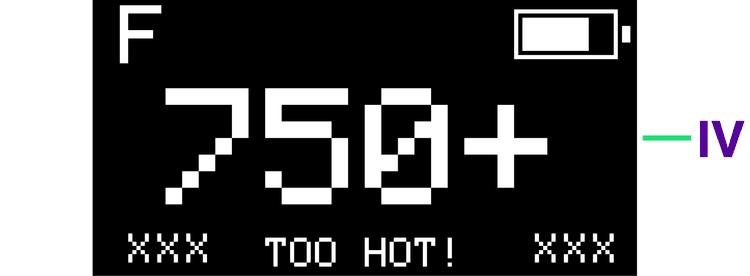
Wait Time
After torching the banger or nail, wait 10 - 15 seconds BEFORE placing the banger or nail over the sensor. Temperature readings above 800° F (426° C) can cause the sensor to quickly recalibrate, which can result in sporadic readings.
Sensor Distance
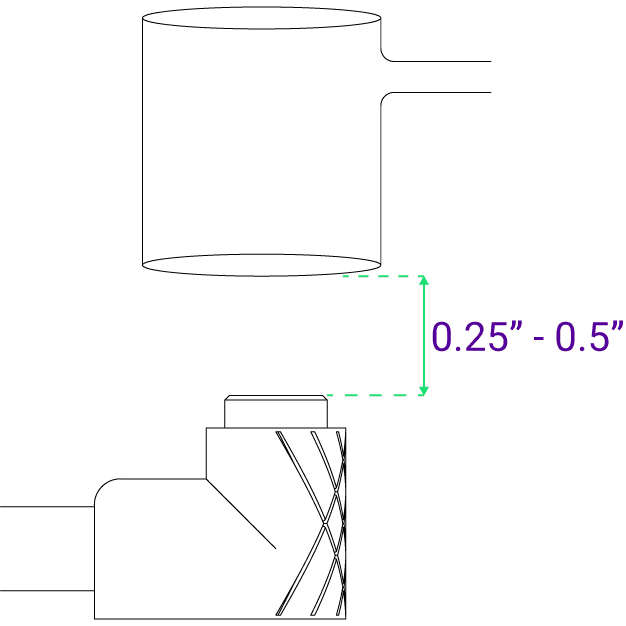
Using the gooseneck arm, place the sensor a 1/4 inch to 1/2 inch under your banger or nail. For best results, ensure the flat top of the sensor is parallel with the bottom of your banger or nail.
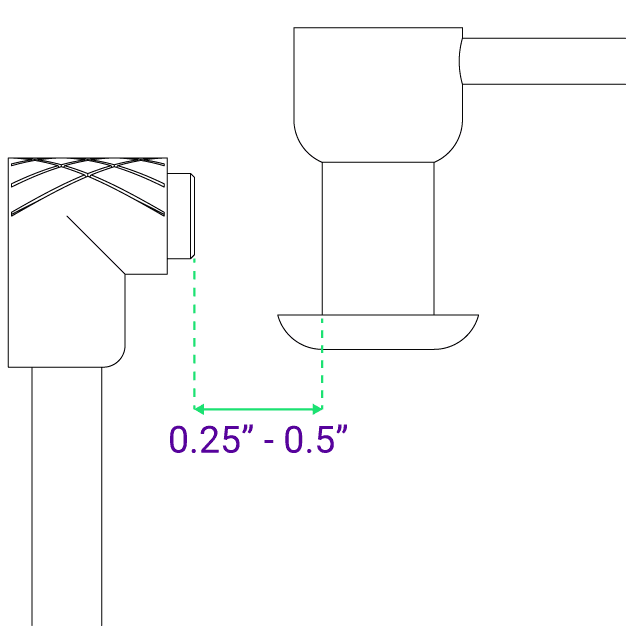
For Slurper style bangers, we recommend placing the sensor horizontally, about 1/4 inch to 1/2 inch away from the vertical column.
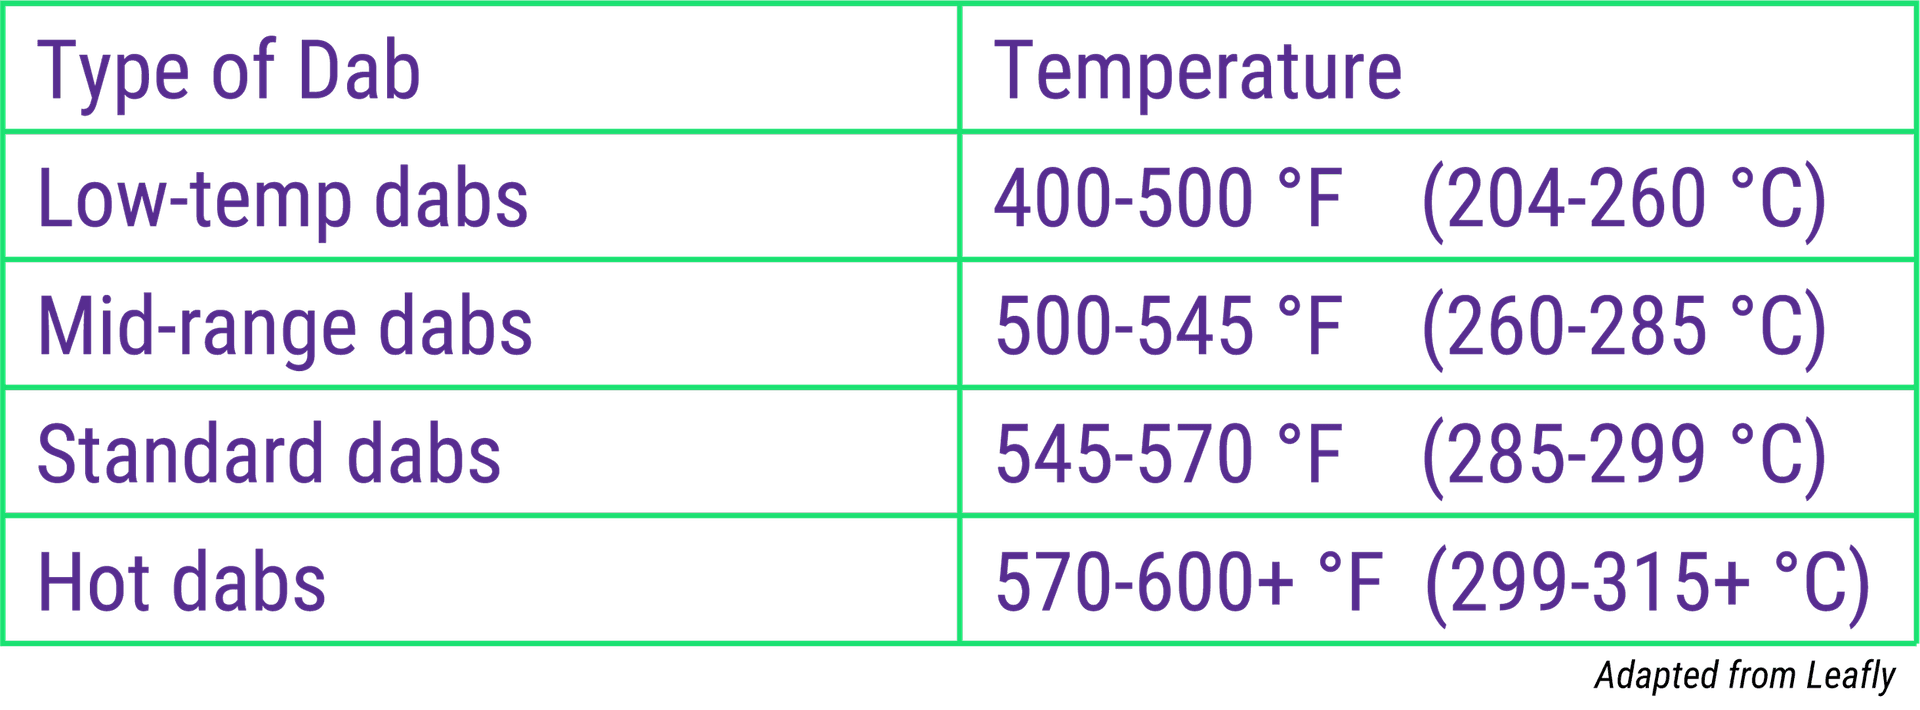
Recommended Temperatures
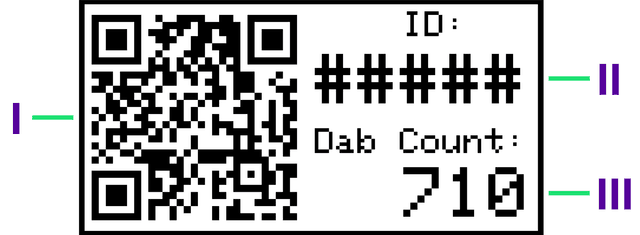
QR Code
How to Display QR Code
Press and hold the Power Button (#1 on the diagram above) for 3 seconds to display the QR Code
QR Code Screen Interface
- QR Code
- Temp Station ID
- Current Dab Count
Warnings
- Not intended for humans or animals
- Keep away from water
- Keep away from open flames
- Do NOT leave in direct sunlight for extended periods of time
- The Infrared (IR) sensor is susceptible to sporadic readings when exposed to extreme changes in temperature
Storage Temperature: 50 - 95°F (10 - 35°C)